
WisperSEO is a powerful tool that simplifies the process of creating high-quality blog posts optimized for SEO. In this tutorial, we will guide you through the steps to create a blog post using WisperSEO, from login to content optimization and publishing. Let’s get started!
Step 1: Login to Your WisperSEO Account
Start by logging into your WisperSEO account using your credentials.
Step 2: Enter a Keyword or Topic
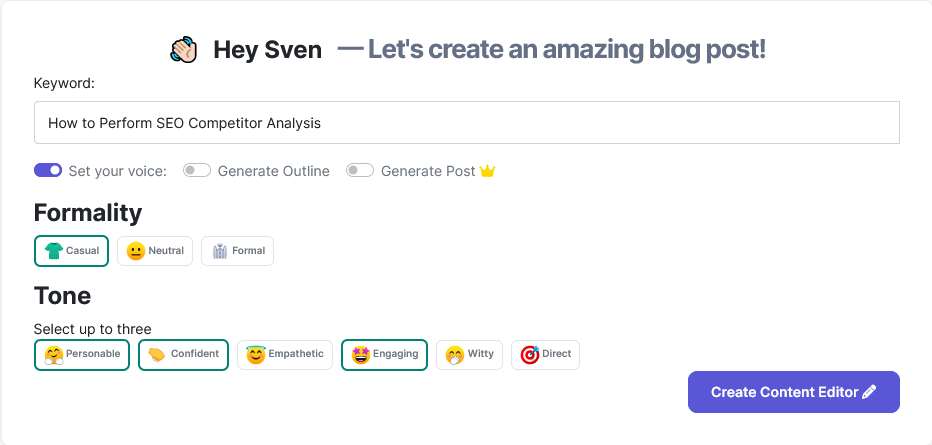
Once you’re on the dashboard, enter a keyword or topic related to your blog post. This will serve as the foundation for your content.

Step 3: Set Your Voice and Formality
Toggle the “Set Your Voice” switch to define the tone and formality of your content. This step helps customize your writing style.
Step 4: Create Content Editor
After setting your voice, click the “Create Content Editor” button. This opens a empty content editor with the analyzed data where you’ll craft your blog post using the recommendations.
Step 5: Generate an Outline (Optional)
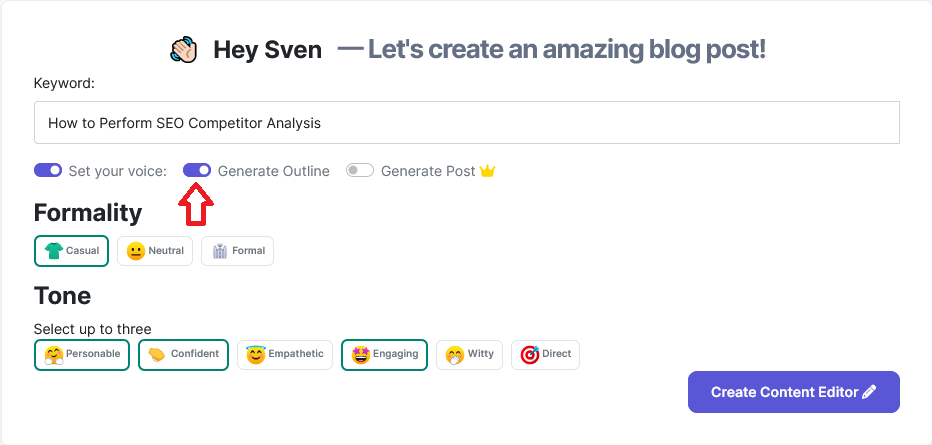
If you’d like to generate a blog post outline, toggle the “Generate Outline” switch before proceeding. This step can help structure your content.
Step 6: Generate a Complete Blog Post (Optional)
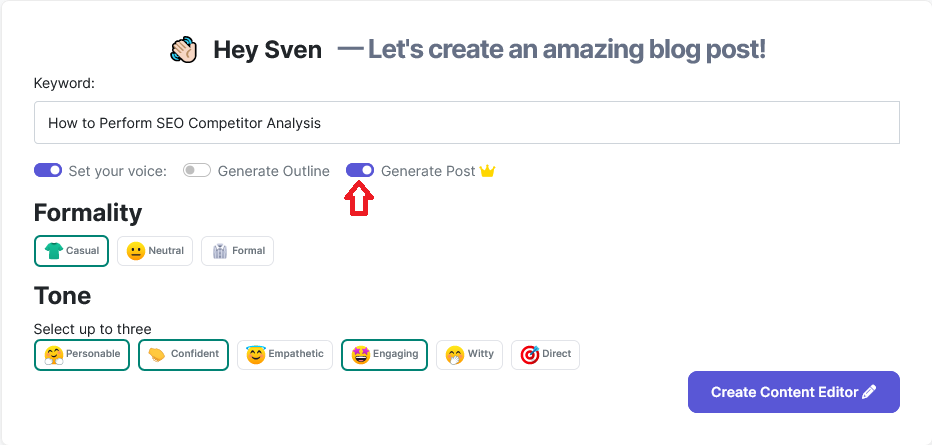
If you want WisperSEO to generate a complete blog post, toggle the “Generate Post” switch. Then, click the “Create Content Editor” button.
Step 7: Analyze SERPs and Competitors
WisperSEO will analyze the search engine results pages (SERPs) and return valuable information about the top-ranking articles. This includes the most-used terms, keywords they are ranking for, headings, the number of images, headings, word count, and more. This process runs in the background, allowing you to work on other tasks.
Step 8: Open in SEO Content Editor
Once the analysis is complete, you can open your content in the SEO Content Editor.

Step 9: Optimize Your Content
In the SEO Content Editor, you’ll find recommendations on how to optimize your content on the right. You can make improvements based on these suggestions.
Step 10: Customize Your Content
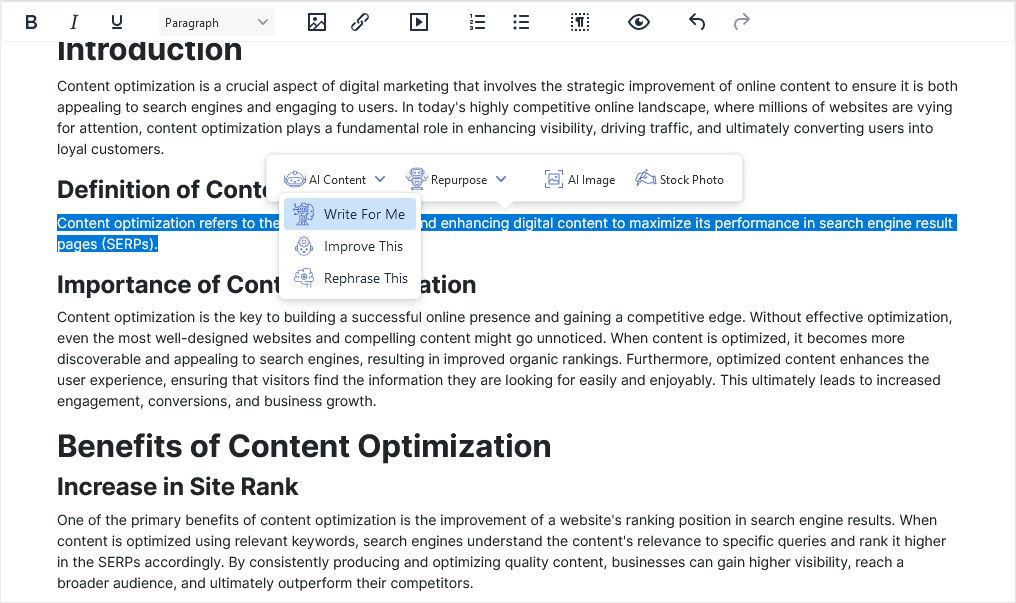
To add or customize your content, highlight any text in the editor and choose from the list of AI options, such as “Write for me,” “Improve,” “Rephrase,” “Summarize,” “Paraphrase,” or type your request for a custom response.
Step 11: Add Images
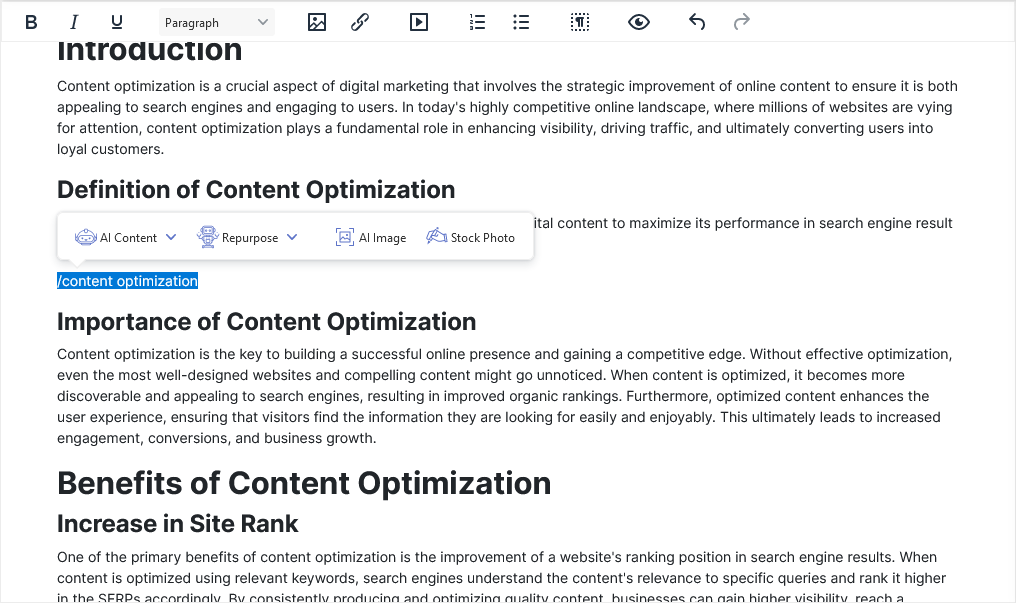
You can easily get images inline in the editor by typing your desired search starting with a backslash, like “/seo.” Highlight it and request either stock images or AI-generated images.
Step 12: Check the Guideline Tab

In the Guideline tab, you’ll find a scorecard that tracks your optimization progress. It shows the recommended words, headings, images, and paragraphs compared to your editor content.
Step 13: Explore Competitor Insights
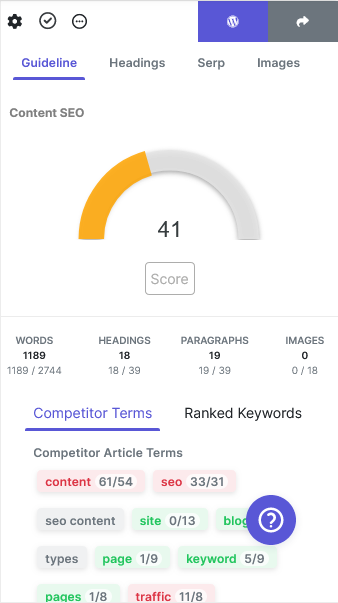
Below the scorecard, you’ll find competitor insights, including top-used article terms and keywords they were ranking for at the time of analysis. Numbers indicate word usage comparisons.
Step 14: Headlines and Images
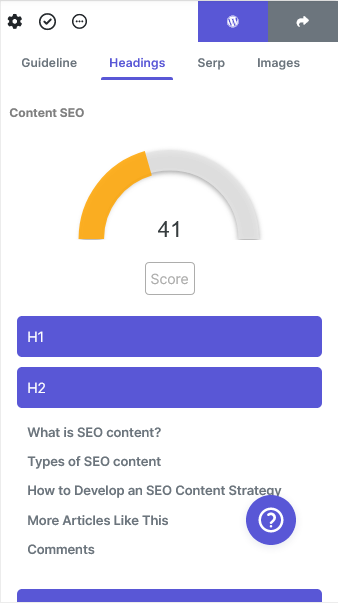
The Headlines tab displays competitors’ headings, separated by h1, h2, h3, etc. Click on any heading to expand it. The Images tab offers the option to retrieve Google images (be mindful of copyright).
Step 15: Edit Post Title
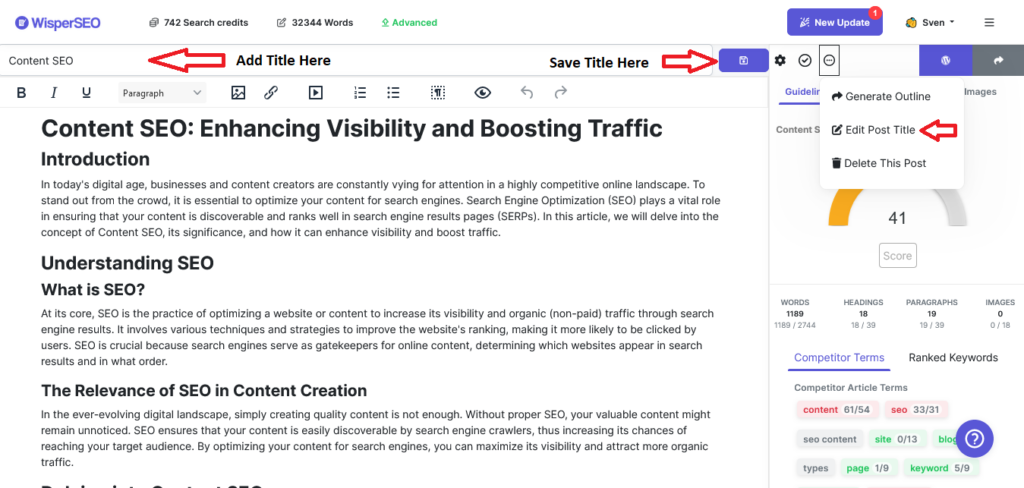
By default, the post title is set to the keyword or topic you entered. To customize the title, click the dropdown and select “Edit Post Title” above the SEO editor.
Step 16: Save and Publish
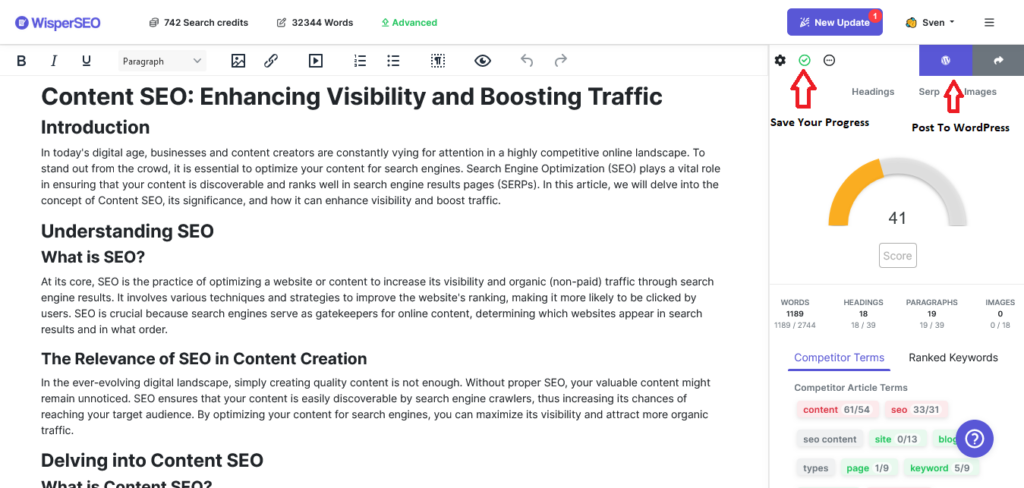
To save your content, simply click the “Save” button as outlined. If you’ve connected your WordPress site to WisperSEO, you can use the “Post to WordPress” option for one-click publishing.
Conclusion: WisperSEO streamlines the process of creating and optimizing blog posts for SEO, helping you achieve better search engine rankings and engage your audience effectively. Follow these steps to create your next compelling blog post with ease. Happy blogging!